Understanding your Right-Click Menu – Audiovisuals
A lot of OnCue's features are accessible in right-click menus for various files and work product. If you're ever in doubt about what you can with something– just right-click it.
Here is a list of articles that show all of the right-click menus in the program:
:::info Additional Articles About Right-Click Menus
- Documents (including the Viewer pane with an audiovisual file showing)
- Transcripts (including the Transcript Viewer pane)
- Designations
- Media Scripts
- Notebooks :::
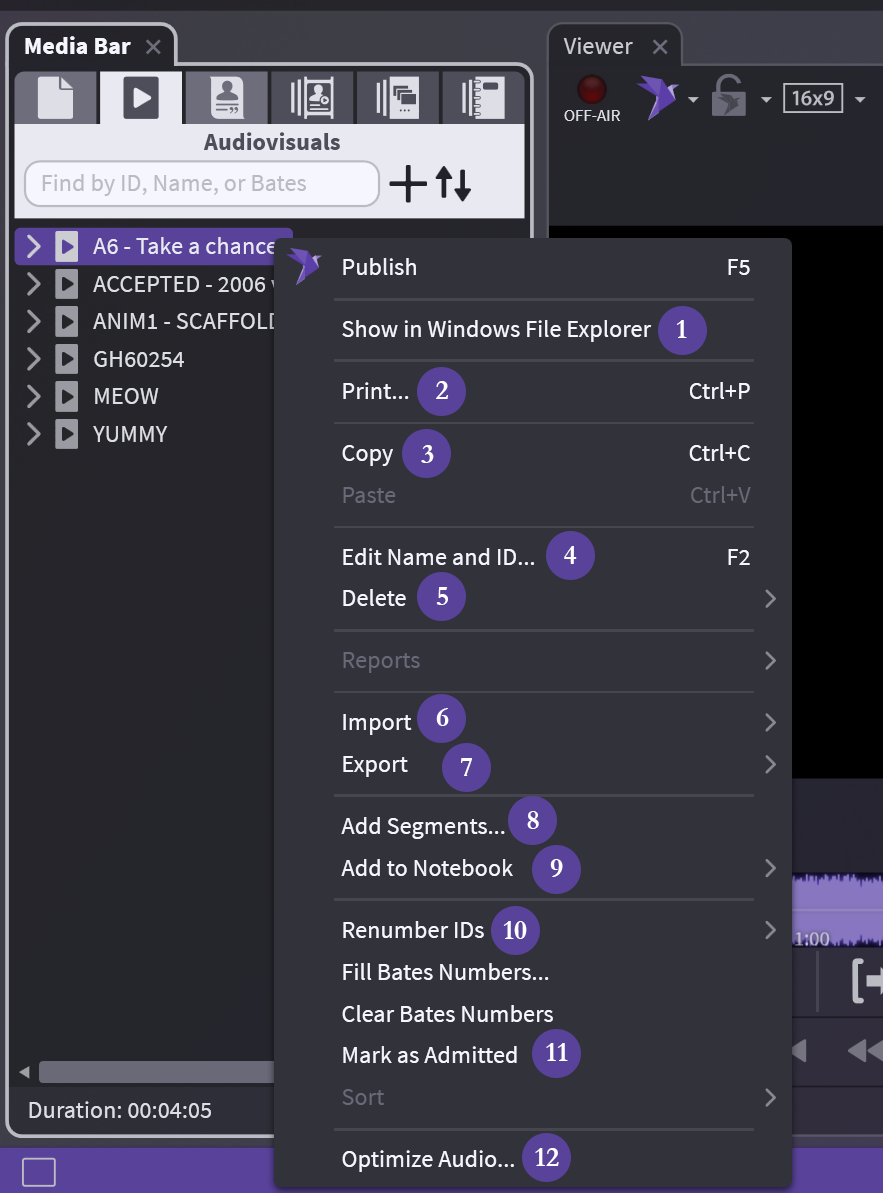
Main Audiovisual Folder:
1. Show in Windows File Explorer: As described – opens folder where your file is
2. Print...: Print IDs, barcodes, and other info for this folder on blank page(s)
3. Copy: Copy your entire AV folder and paste into a Notebook or Media Script
4. Edit Name and ID...: Change the name and ID in OnCue only, not underlying file
5. Delete: Careful, 2 options: database only or database and drive
6: Import: All options for import available, not tied to audiovisuals
7. Export: Exhibit list
8. Add Segments...: Add another AV file to existing folder (like adding pages to a non-PDF document)
9. Add to Notebook: Add to existing (list provided) or create new
10. Renumber IDs: Move AV segments (files) in the folder or delete things, keep your IDs consecutive using this
11. Mark as Admitted: Marks AV file as admitted
12. Optimize Audio...: Having audio or video issues? this optimizes just the file you have selected
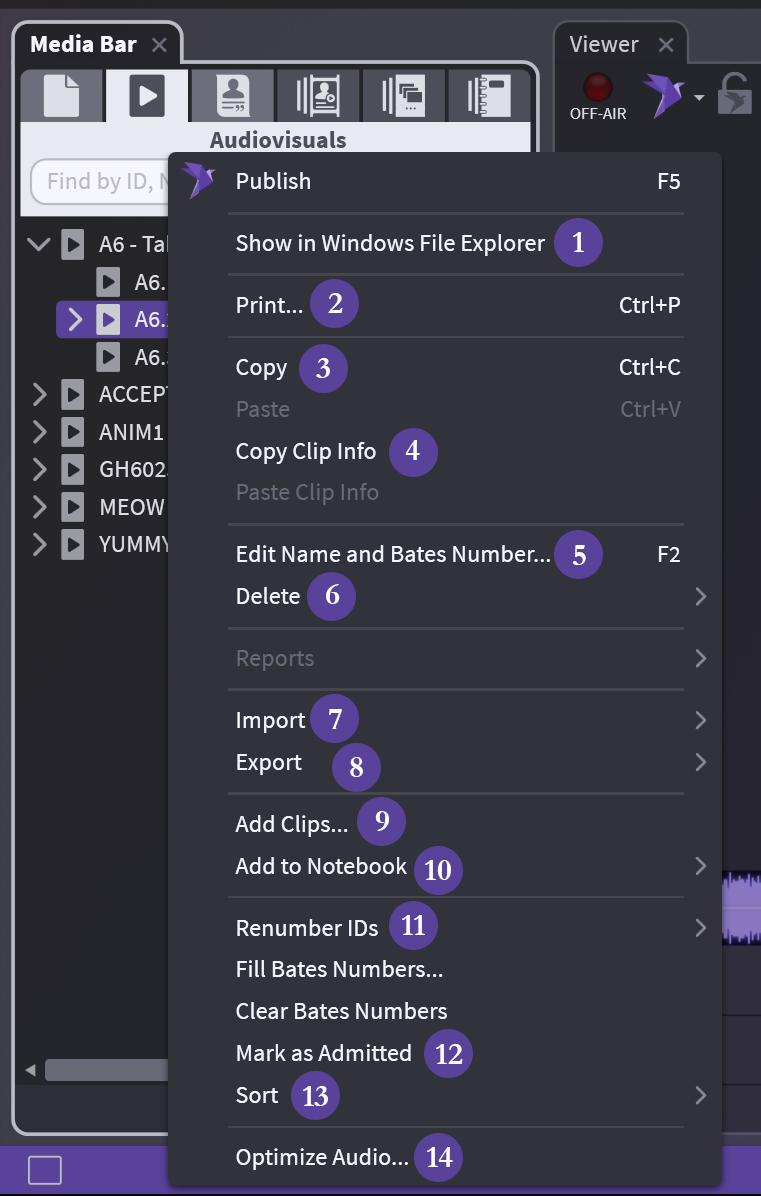
Audiovisual Segment Level:
1. Show in Windows File Explorer: As described – opens folder where your file is
2. Print...: Print IDs, barcodes, and other info for this folder on blank page(s)
3. Copy: Copy the segment or multiple segments and paste into a Notebook or Media Script
4. Copy Clip Info: Copy the clip time info and paste in another segment to create a new clip under that segment (if only 1 clip in segment)
5. Edit Name and Bates Number: Change the name and Bates in OnCue only, not underlying file
6: Delete: Careful, 2 options: database only or database and drive
7. Import: All options for import available, not tied to audiovisuals
8. Export: 1 option: exhibit list
9. Add Clips...: Add clip to existing segment (using timecode)
10. Add to Notebook: Add to existing (list provided) or create new
11. Renumber IDs: Move AV segments (files) in the folder or delete things, keep your IDs consecutive using this
12. Mark as Admitted: Marks clip as admitted
13. Sort: 2 options: by ID or by Timecode
14. Optimize Audio...: Having audio or video issues? this optimizes just the file you have selected
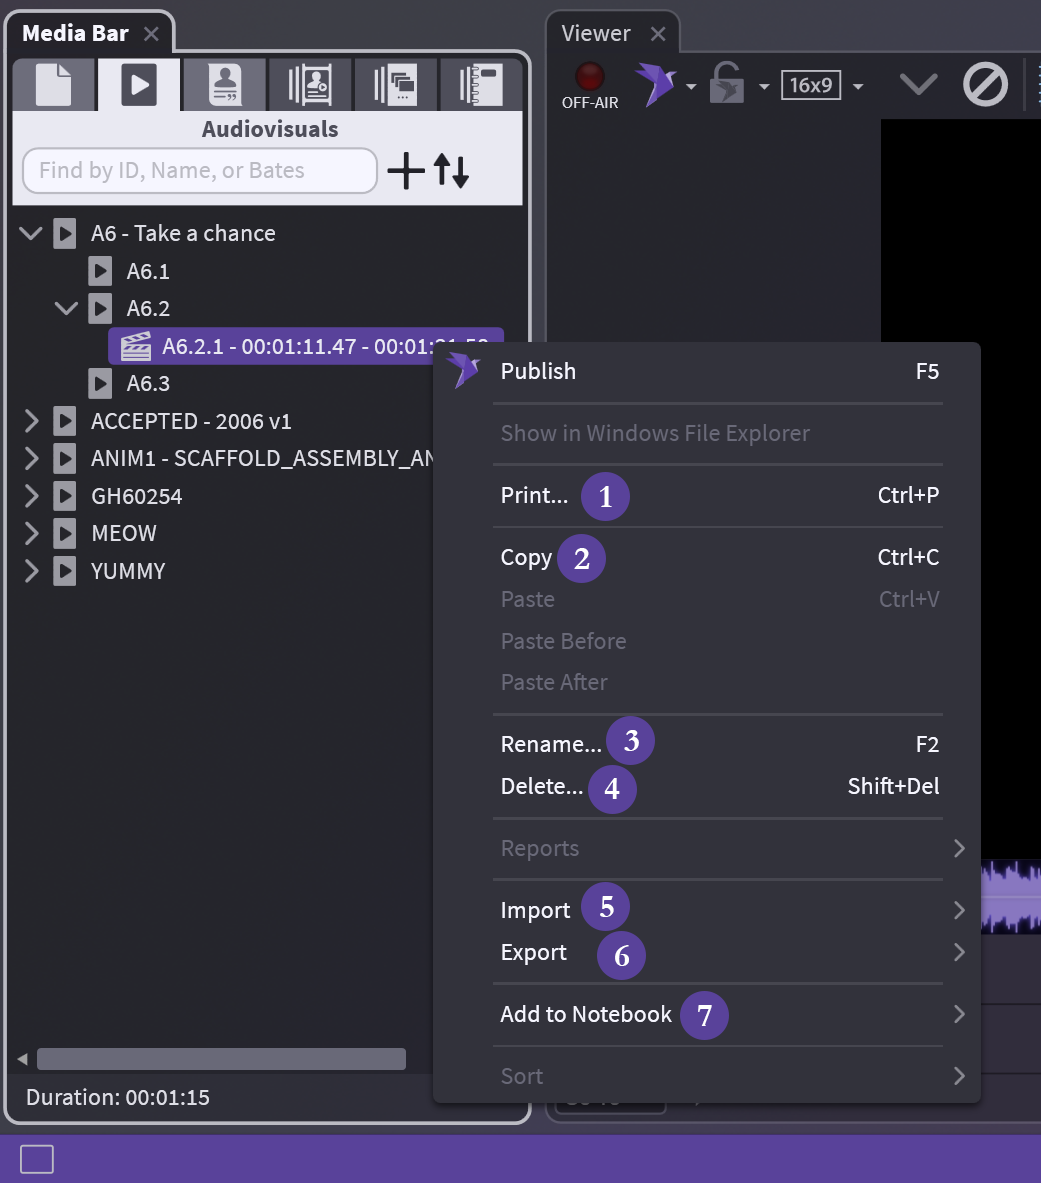
Audiovisual Clip Level:
(1) Print
Print IDs, barcodes, and other info for this folder on blank page(s)
(2) Copy
Copy the clip and paste into a Notebook or Media Script
(3) Rename...
Change the name of the clip only, not underlying file
(4) Delete
Deletes from case completely (treat it like an annotation)
(5) Import
All options for import available, not tied to audiovisuals
(6) Export
2 options: exhibit list, export video–you can export single or multiple clips from the same file
(7) Add to Notebook
Add to existing (list provided) or create new
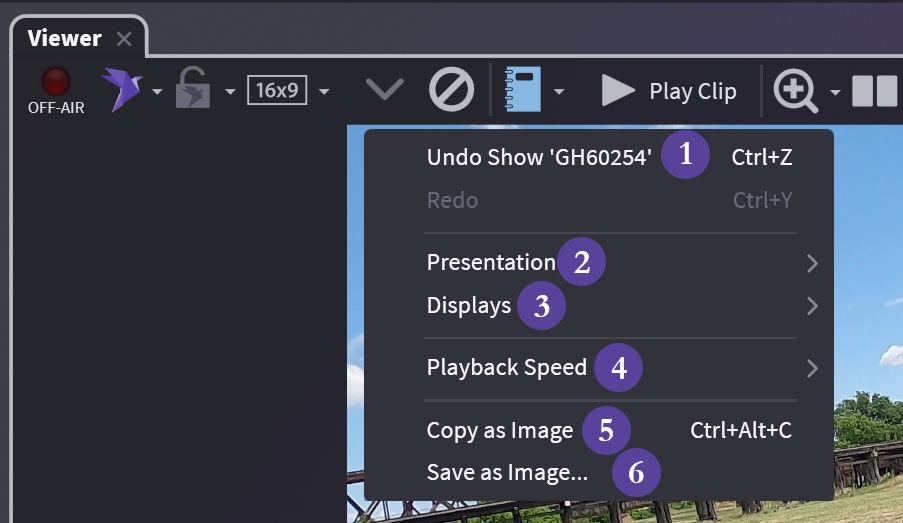
Audiovisual in Viewer:
(1) Undo
As described
(2) Presentation
Choose how you present
(3) Displays
Choose your display
(4) Playback Speed
Speed up or slow down playback - NOT for presentation
(5) Copy as Image
No background copied - (see Copying & Exporting Images if background is needed)
(6) Save as Image
Save as *.png