Understanding your Right-Click Menu – Documents
:::info Additional Articles About Right-Click Menus
- Audiovisuals (including the Viewer pane with an audiovisual file showing)
- Transcripts (including the Transcript Viewer pane)
- Designations
- Media Scripts
- Notebooks :::
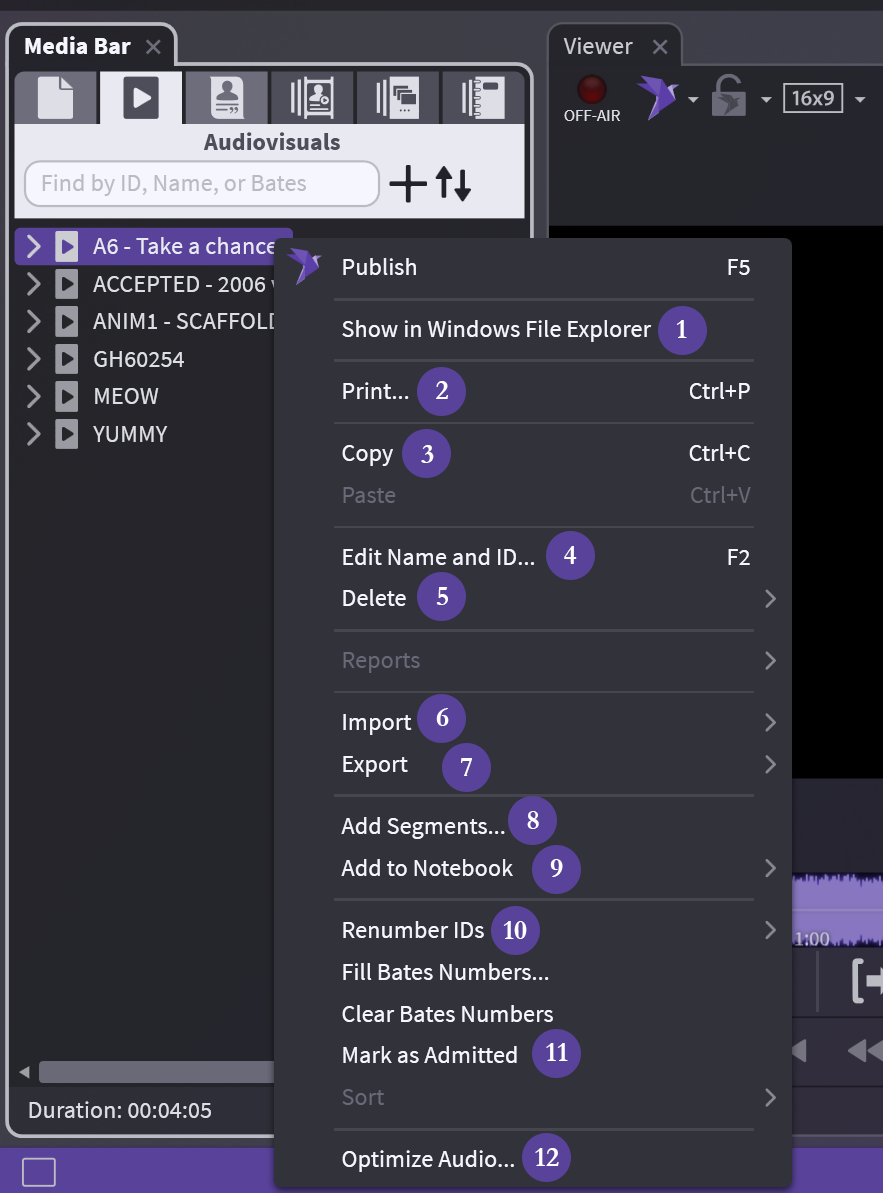
Main Document
1) Show in Windows File Explorer: Opens folder to file location
2) Print...: Print IDs, barcodes, and other info for this folder on blank page(s)
3) Copy: Copy your entire AV folder and paste into a Notebook or Media Script
4) Edit Name and ID...: Change the name and ID in OnCue only, not underlying file
5) Delete: Careful, 2 options: database only or database and drive
6) Import: All options for import available, not tied to audiovisuals
7) Export: Exhibit list
8) Add Segments...: Add another AV file to existing folder (like adding pages to a non‑PDF document)
9) Add to Notebook: Add to existing (list provided) or create new
10) Renumber IDs: Move AV segments (files) in the folder or delete things, keep your IDs consecutive using this
11) Mark as Admitted: Marks AV file as admitted
12) Optimize Audio...: Having audio or video issues? this optimizes just the file you have selected
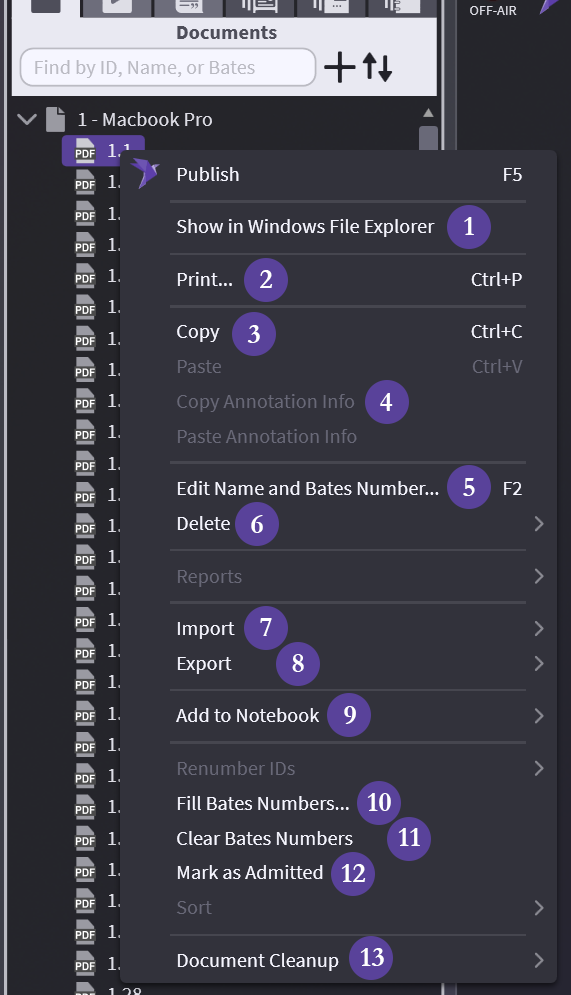
Element/Segment Level
1) Show in Windows File Explorer: Opens folder to file location
2) Print...: Exactly as described – see Printing for options
3) Copy: Copy your entire document and paste: into Notebook, Media Script, or another document
4) Copy Annotation Info: Copy the Annotation to a different page or document. Annotations are “directions” of where on the page to annotate and what to do.
5) Edit Name and Bates Number...: Change the name of page and Bates in OnCue only, not underlying document
6) Delete: Careful, 2 options: database only or database and drive
7) Import: All options for import available, not tied to documents
8) Export: 2 options: exhibit list and images
9) Add to Notebook: Add to existing (list provided) or create new
10) Fill Bates Numbers: See Bates Numbering – Filling & Importing for options
11) Clear Bates Numbers: Careful, whatever you're clicked on will clear and there is no undo
12) Mark as Admitted: Exactly as described – see Admitted Exhibits for more information
13) Document Cleanup: Not recommended to do an entire database at once
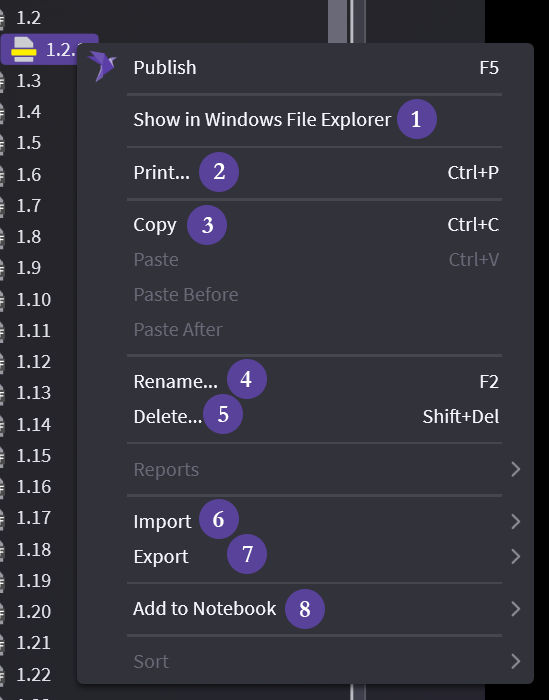
Treatment/Annotation Level
1) Show in Windows File Explorer: Exactly as described – opens folder where your file is
2) Print...: Exactly as described – see Printing for options
3) Copy: Copy the selected elements and paste – into a Notebook or Media Script
4) Rename: Change the name or add a name
5) Delete: Careful – no undo
6) Import: All options for import available, not tied to documents
7) Export: 2 options: exhibit list and images
8) Add to Notebook: Add to existing (list provided) or create new
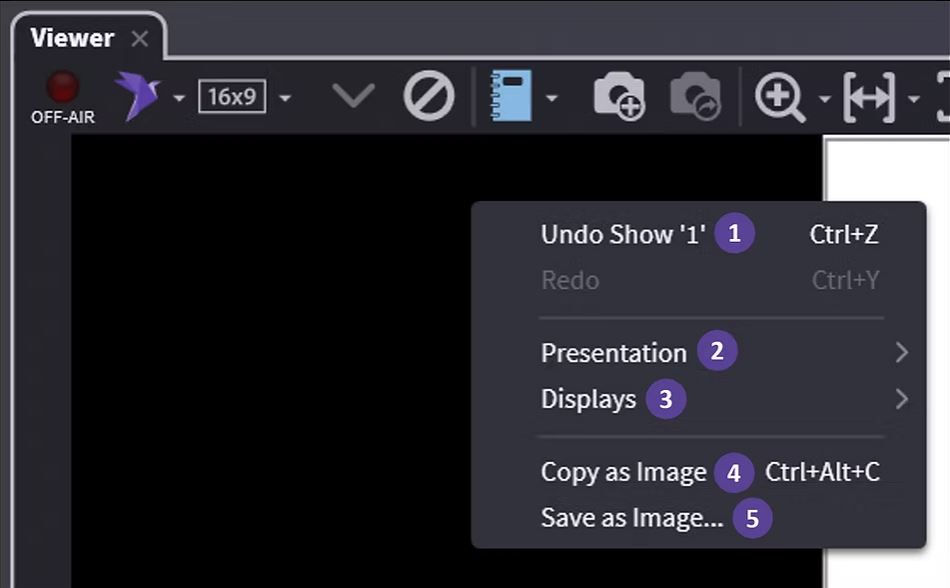
Document in Viewer
1) Undo Show/Redo: As described
2) Presentation: Choose how you present
3) Displays: Choose your display
4) Copy as Image: No background copied – (see Copying & Exporting Images if background is needed)
5) Save as Image...: Save as *.png