Adding Multimedia Files
About Multimedia Files or Audiovisuals
What are these files? They are surveillance videos, street cam footage, animations and maybe phone calls. OnCue allows users to manage, edit, and present other types of files besides documents and deposition video.
Now, we can’t tell you that OnCue will take every type of file. We won’t be able to add obscure, proprietary files. DICOM? Nope, sorry you’ll need to convert that to something else. But we can take .vob and we won’t judge you if you are still using DVDs, well…maybe a little. Seriously, who uses DVDs anymore?!
If none of this jargon means anything to you, no worries. It’s confusing and the bottom line is we’ll take most anything you have but if you need to know the tech specs, see below.
Adding Multimedia/Audiovisual Files
OnCue can take various types of video (avi, mpg, mpeg, mp4, wmv) and audio files (mp3, m4a and wav). For a complete list check out the next section below. OnCue treats these files similar to how it treats single-page images so you'll need to pay attention to naming conventions.
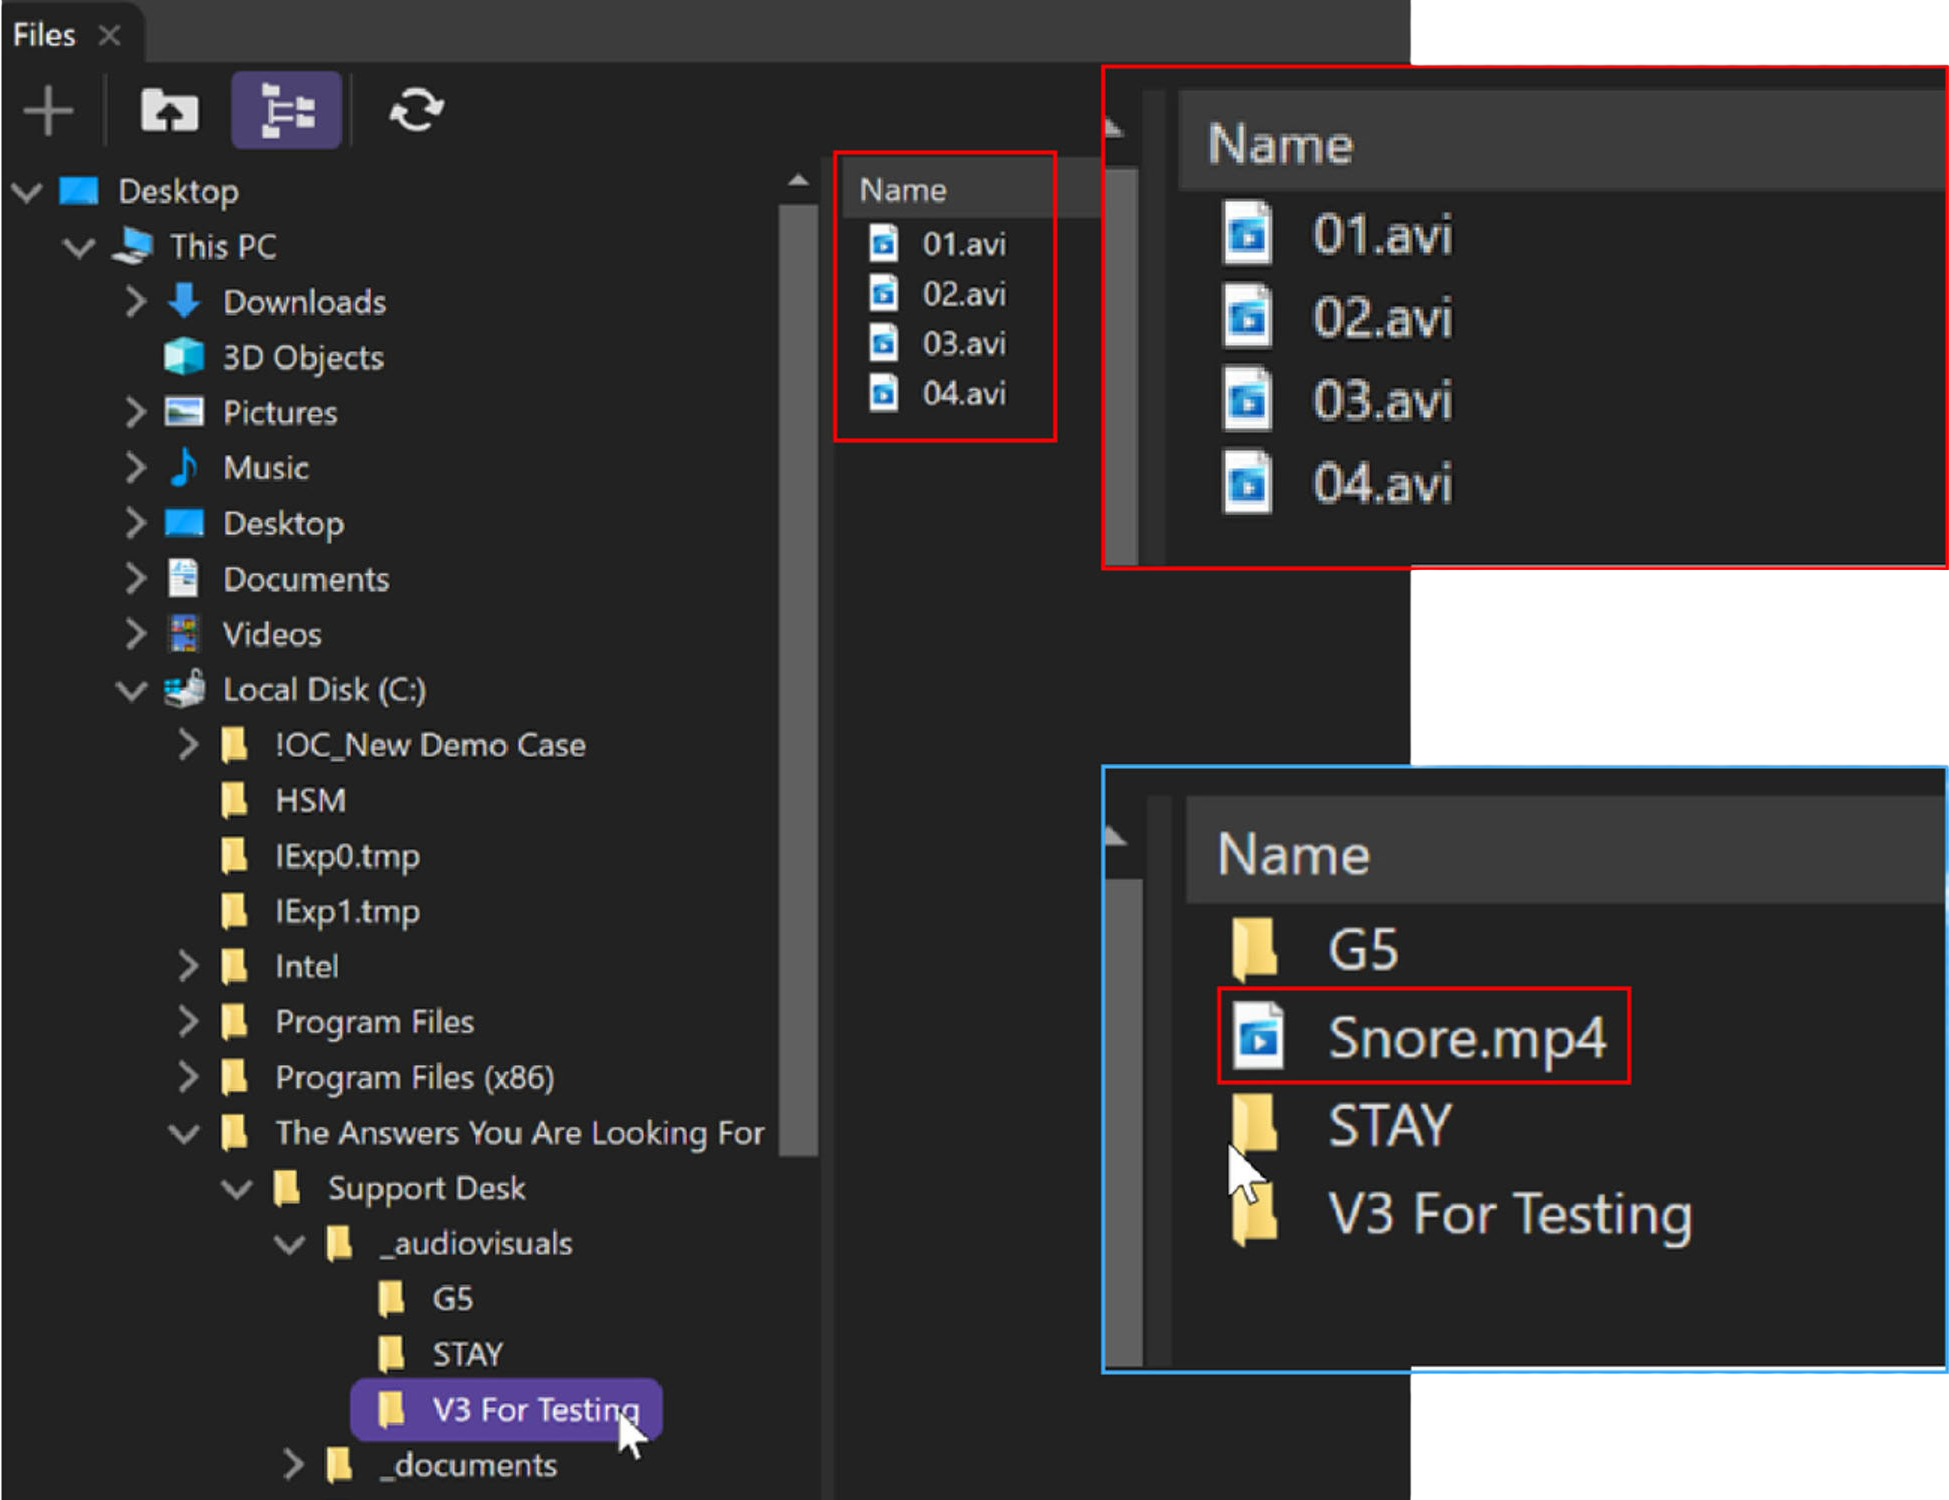
If you have a set of videos that you want as one exhibit, put them all in one folder and add them like you would a document in a folder. It will treat the folder as the media and the individual files as "pages" (as shown in red).
If your files are individual exhibits, you can register these without folder (as shown in blue).
OnCue will name them for the file, just like it does documents.
It will also copy these files in the case folder under the _audiovisuals folder, if you didn’t already put them there.
To add these multimedia files to your OnCue database, click on the Add Media tab in the Workflow Ribbon and navigate to your multimedia/audiovisual file in OnCue’s File Explorer window. Left-click and drag the selected file to anywhere on the Media Bar. You can also click the "+" button in the Audiovisuals tab and browse your computer to add the media.
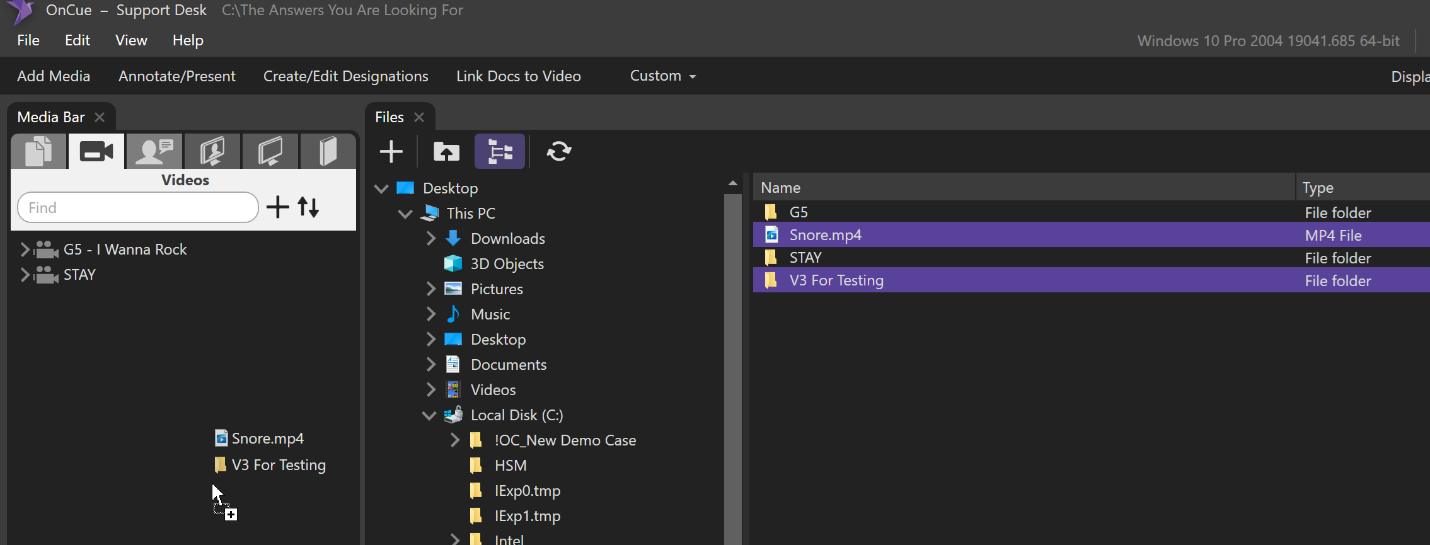
When you add these files, OnCue copies them to your audiovisuals folder just like it copies documents to the documents folder.
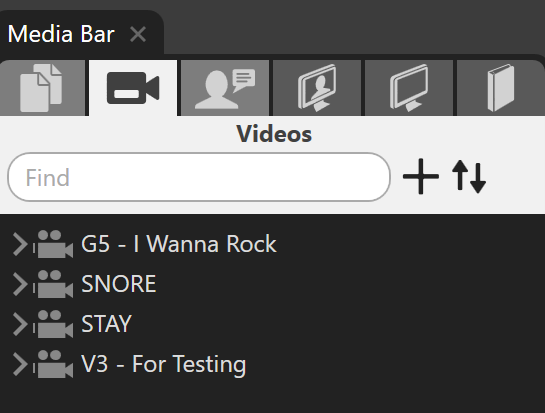
“V3 For Testing” becomes “V3” = ID and “For Testing” = name, if you have your registration/add options set to the “truncate on space” default.
“Snore.mp4” becomes “Snore” = ID with no name.
Supported File Formats
| Video formats | |
|---|---|
| avi | mp4 |
| divx | m4v |
| flv | mov |
| gif | mkv |
| mpeg | vob |
| mpeg1 | wmv |
| mpegts | webm |
| mpg | xvid |
| m2v |
| Audio formats | |
|---|---|
| aac | ogg |
| ac3 | ts |
| aiff | wav |
| mp3 | wma |
| m4a |
Right-Click Menus
Main Audiovisual Folder
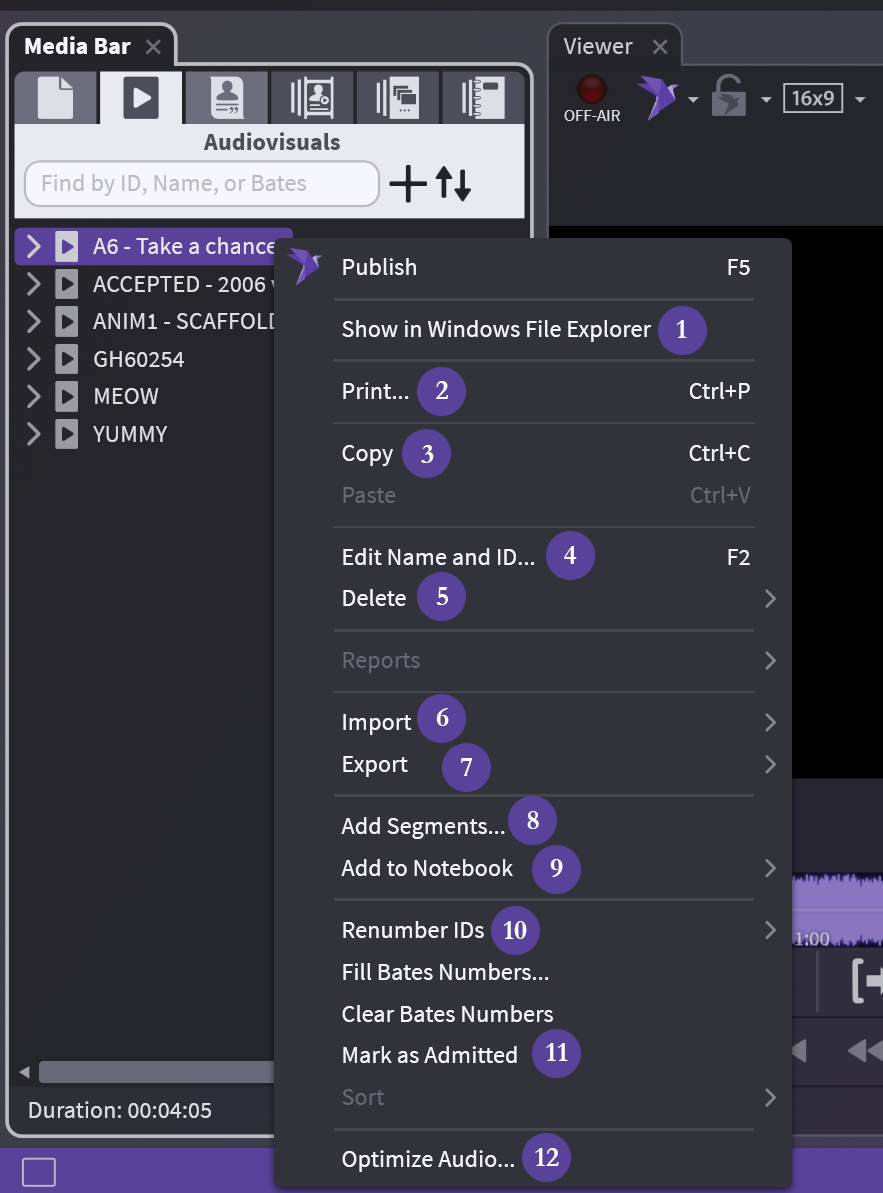
- Show in Windows File Explorer — Exactly as described – opens folder where your file is
- Print... — Print IDs, barcodes, and other info for this folder on blank page(s)
- Copy — Copy your entire AV folder and paste into a Notebook or Media Script
- Edit Name and ID... — Change the name and ID in OnCue only, not underlying file
- Delete — Careful, 2 options: database only or database and drive
- Import — All options for import available, not tied to audiovisuals
- Export — 1 option: exhibit list
- Add Segments... — Add another AV file to existing folder (like adding pages to a non-PDF document)
- Add to Notebook — Add to existing (list provided) or create new
- Renumber IDs — Move AV segments (files) in the folder or delete things, keep your IDs consecutive using this
- Mark as Admitted — Marks AV file as admitted
- Optimize Audio... — Having audio or video issues? this optimizes just the file you have selected
Segment Level
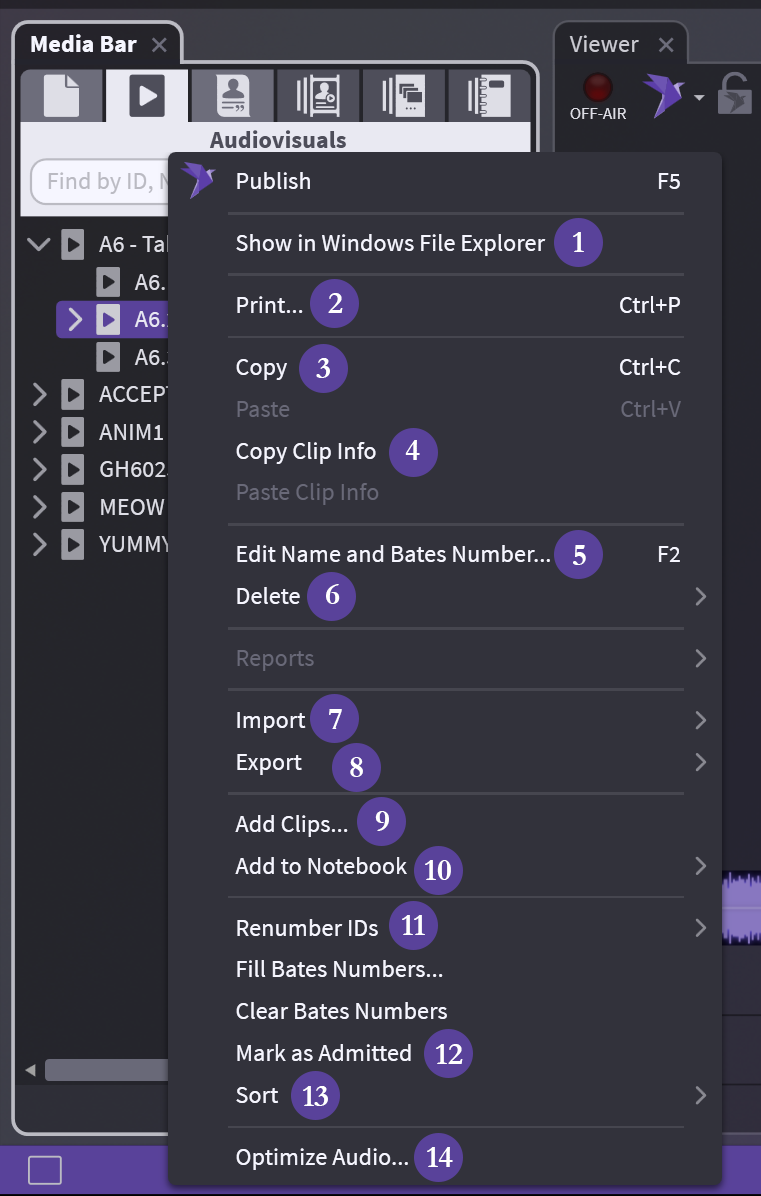
- Show in Windows File Explorer — Exactly as described – opens folder where your file is
- Print... — Print IDs, barcodes, and other info for this folder on blank page(s)
- Copy — Copy the segment or multiple segments and paste into a Notebook or Media Script
- Copy Clip Info — Copy the clip time info and paste in another segment to create a new clip under that segment (if only 1 clip in segment)
- Edit Name and Bates Number... — Change the name and Bates in OnCue only, not underlying file
- Delete — Careful, 2 options: database only or database and drive
- Import — All options for import available, not tied to audiovisuals
- Export — 1 option: exhibit list
- Add Clips... — Add clip to existing segment (using timecode)
- Add to Notebook — Add to existing (list provided) or create new
- Renumber IDs — Move AV segments (files) in the folder or delete things, keep your IDs consecutive using this
- Mark as Admitted — Marks clip as admitted
- Sort — 2 options: by ID or by Timecode
- Optimize Audio... — Having audio or video issues? this optimizes just the file you have selected
Clip Level
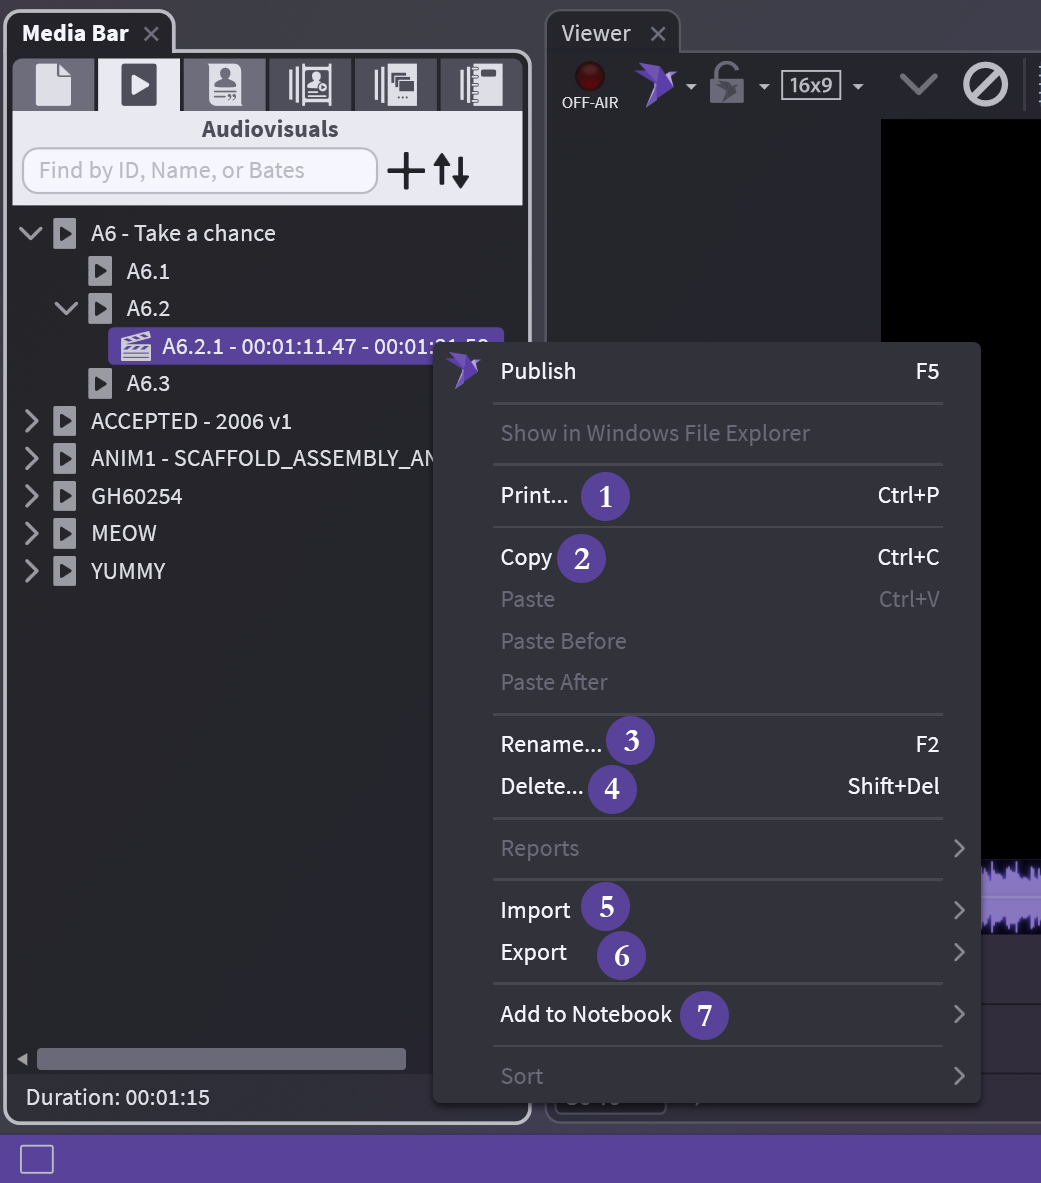
- Print... — Print IDs, barcodes, and other info for this folder on blank page(s)
- Copy — Copy the clip and paste into a Notebook or Media Script
- Rename... — Change the name of the clip only, not underlying file
- Delete — Deletes from case completely (treat it like an annotation)
- Import — All options for import available, not tied to audiovisuals
- Export — 2 options: exhibit list, export video–you can export single or multiple clips from the same file
- Add to Notebook — Add to existing (list provided) or create new
Audiovisual in Viewer

- Undo — As described
- Presentation — Choose how you present
- Displays — Choose your display
- Playback Speed — Speed up or slow down playback - NOT for presentation
- Copy as Image — No background copied - (see Copying & Exporting Images if background is needed)
- Save as Image — Save as
*.png