Adding Pages To Documents
Adding pages to a document is easy. PDFs and Foldered Individual non-PDF document types are handled differently.
Adding PDFs
OnCue recognizes when you add pages to your underlying PDF. If you want to replace a page, you can replace it in the PDF and OnCue will recognize the new page. When making the changes to the PDF make sure the document is not in the Viewer in OnCue.
Example
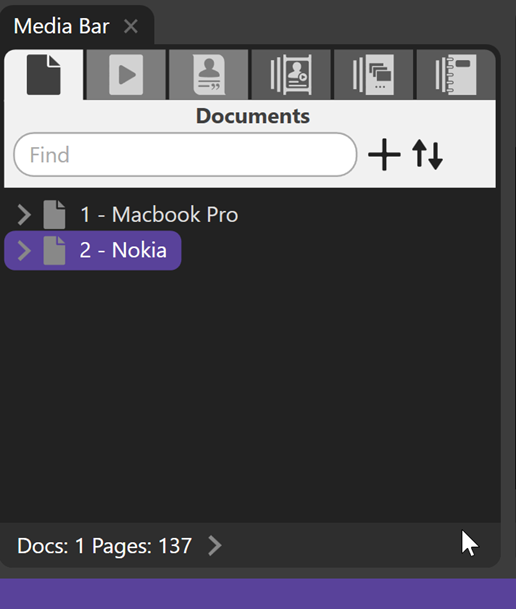
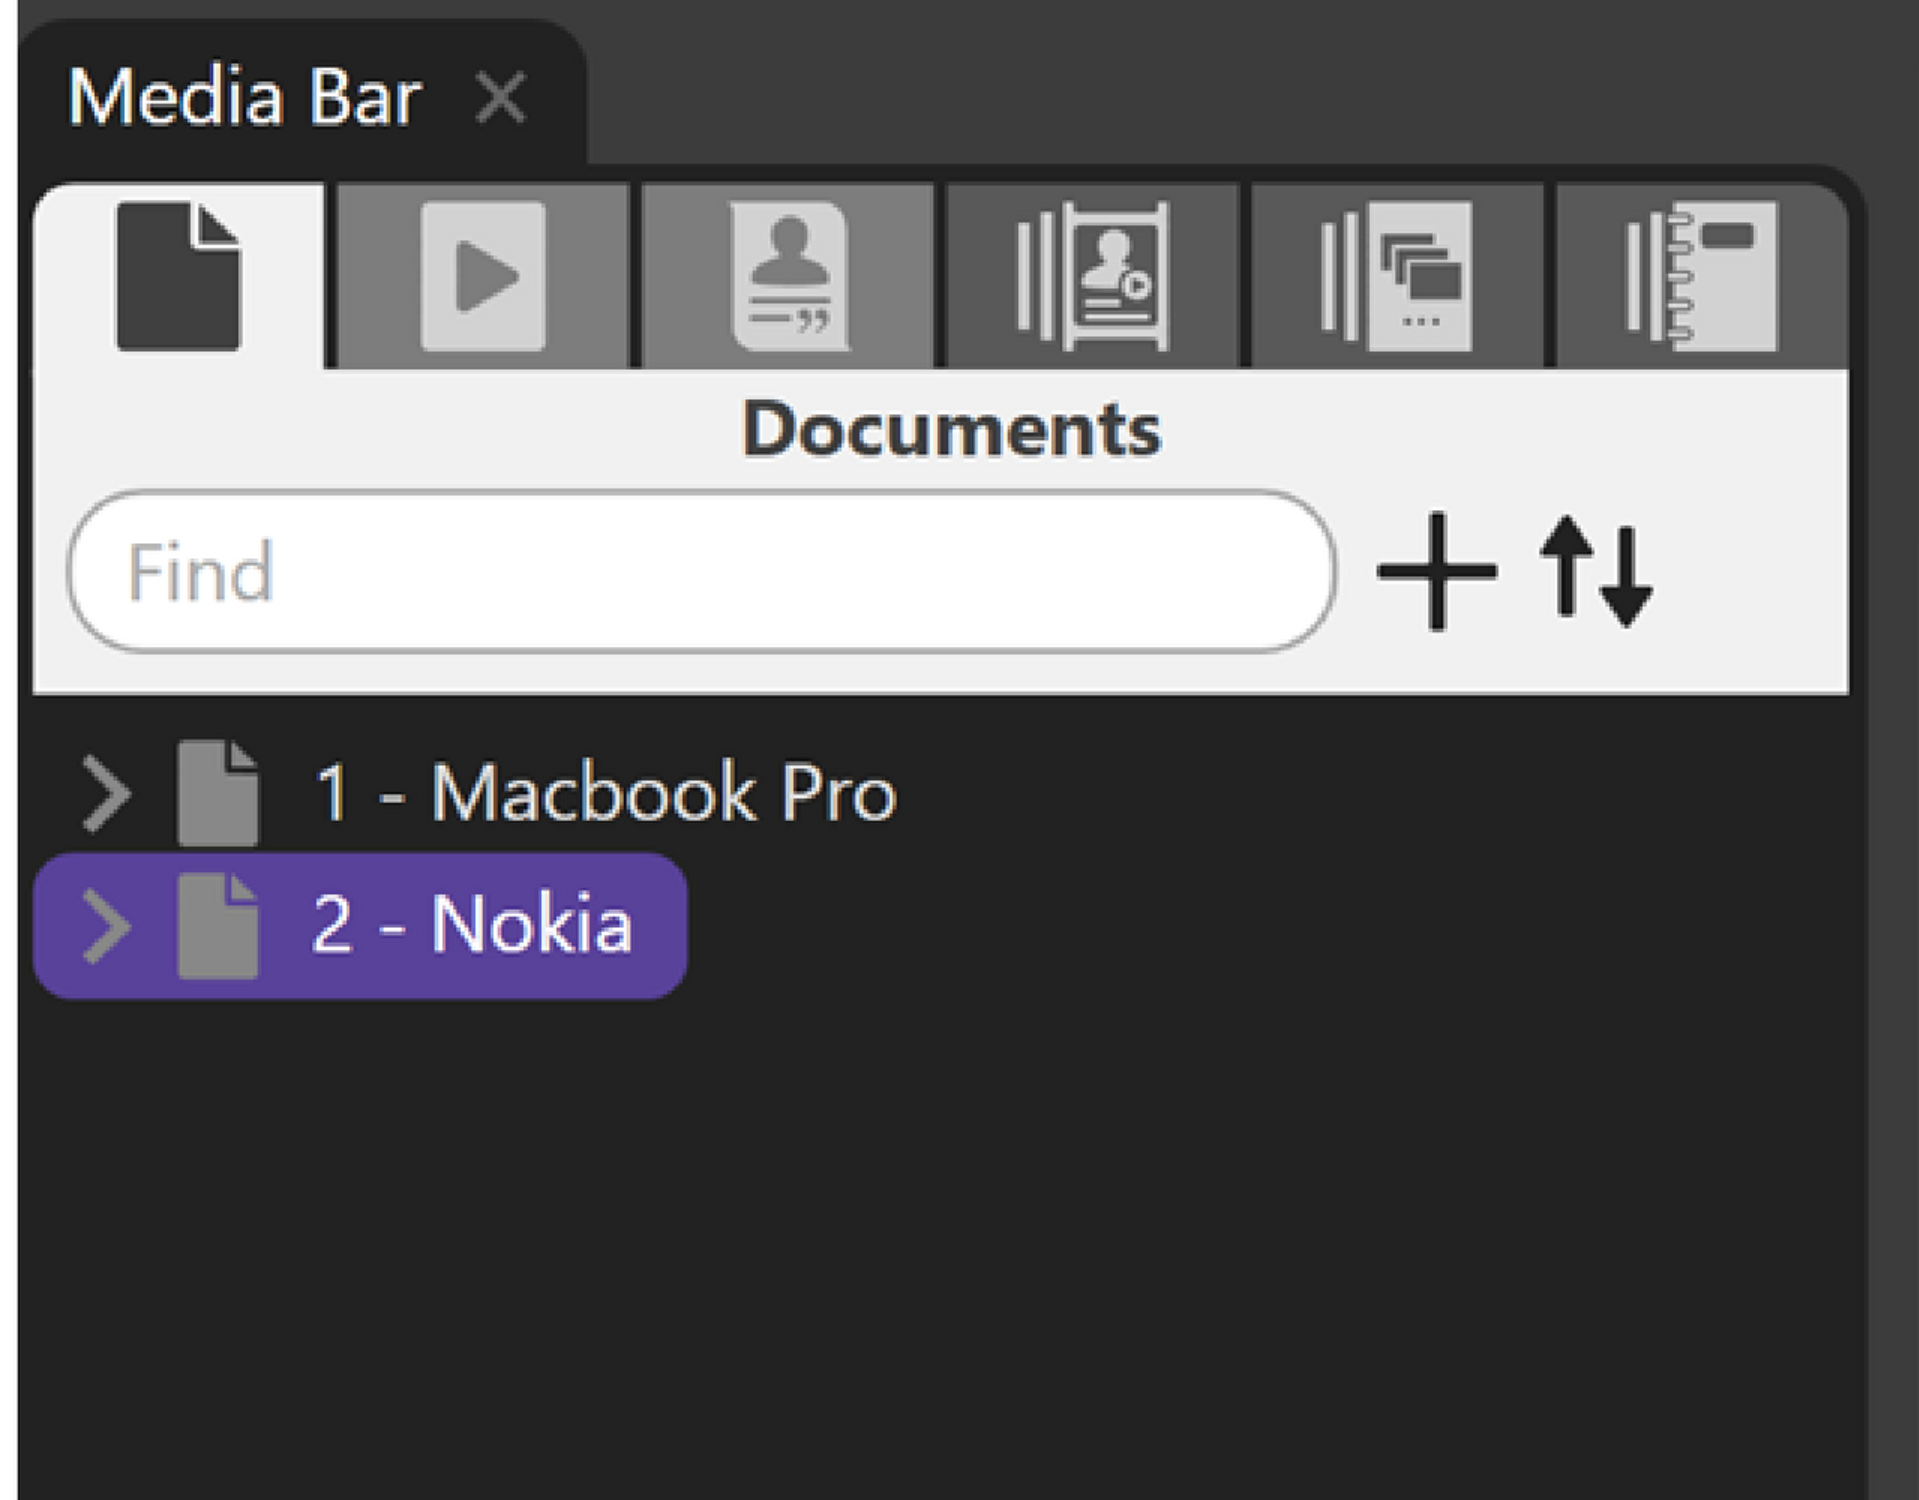
Nokia document has 137 pages as you can see at the bottom.
After selecting the files or folders to be added, drag them over to the Documents section of the Media Bar or hit the + at the top of your Files pane.
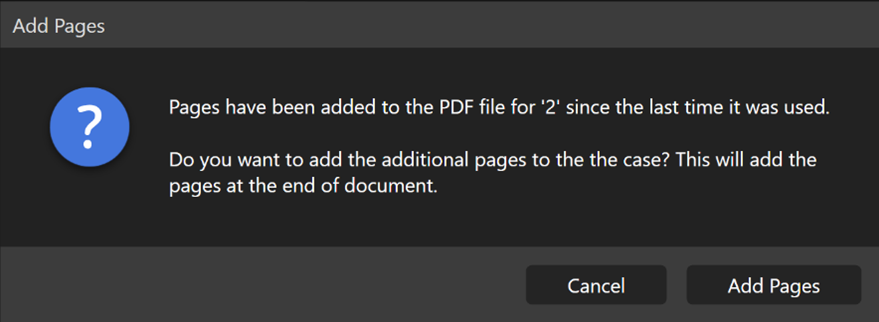
If you add pages to your PDF in your _documents folder you will see this when you click on the document in OnCue after saving in your PDF program.
Add the pages and hit refresh. Done. If you are changing a document and adding pages in the middle, you will get the same dialog. OnCue will read the pages in order.
If you have existing annotations, adding/replacing pages can affect them.
A Slack-first “expense wizard” that collects details + receipt, then posts to Harvest, is very doable.
Deleting Pages
The same principal applies to deleting pages from a PDF. If you delete a page on one of your underlying documents, OnCue recognizes that and will ask you about it.
For Non-PDFs (.tif, .jpg, .png, etc.)
Example
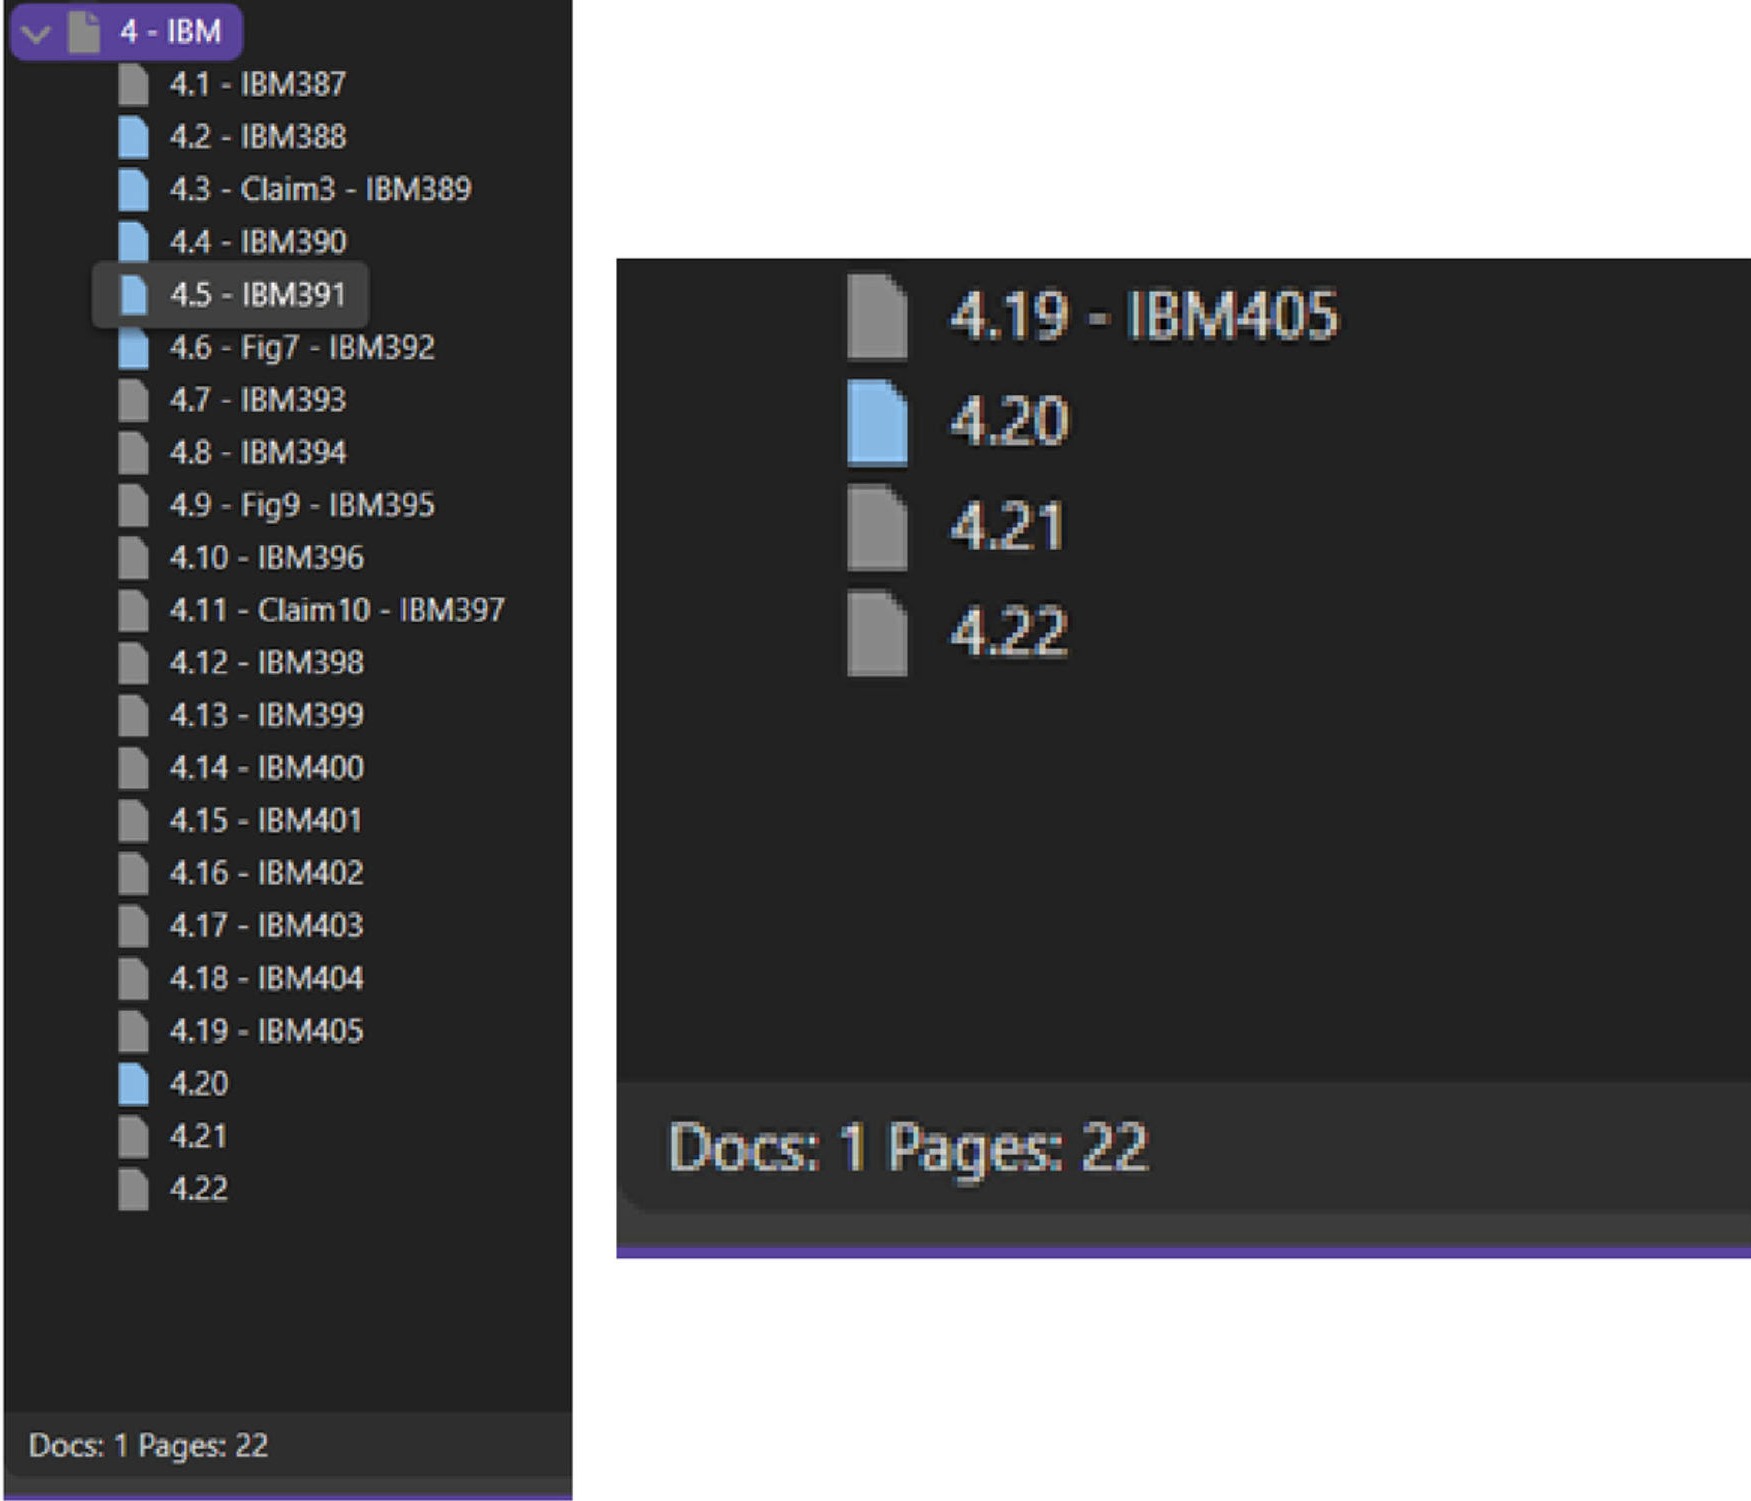
You can see that 4 - IBM has 19 pages in it.

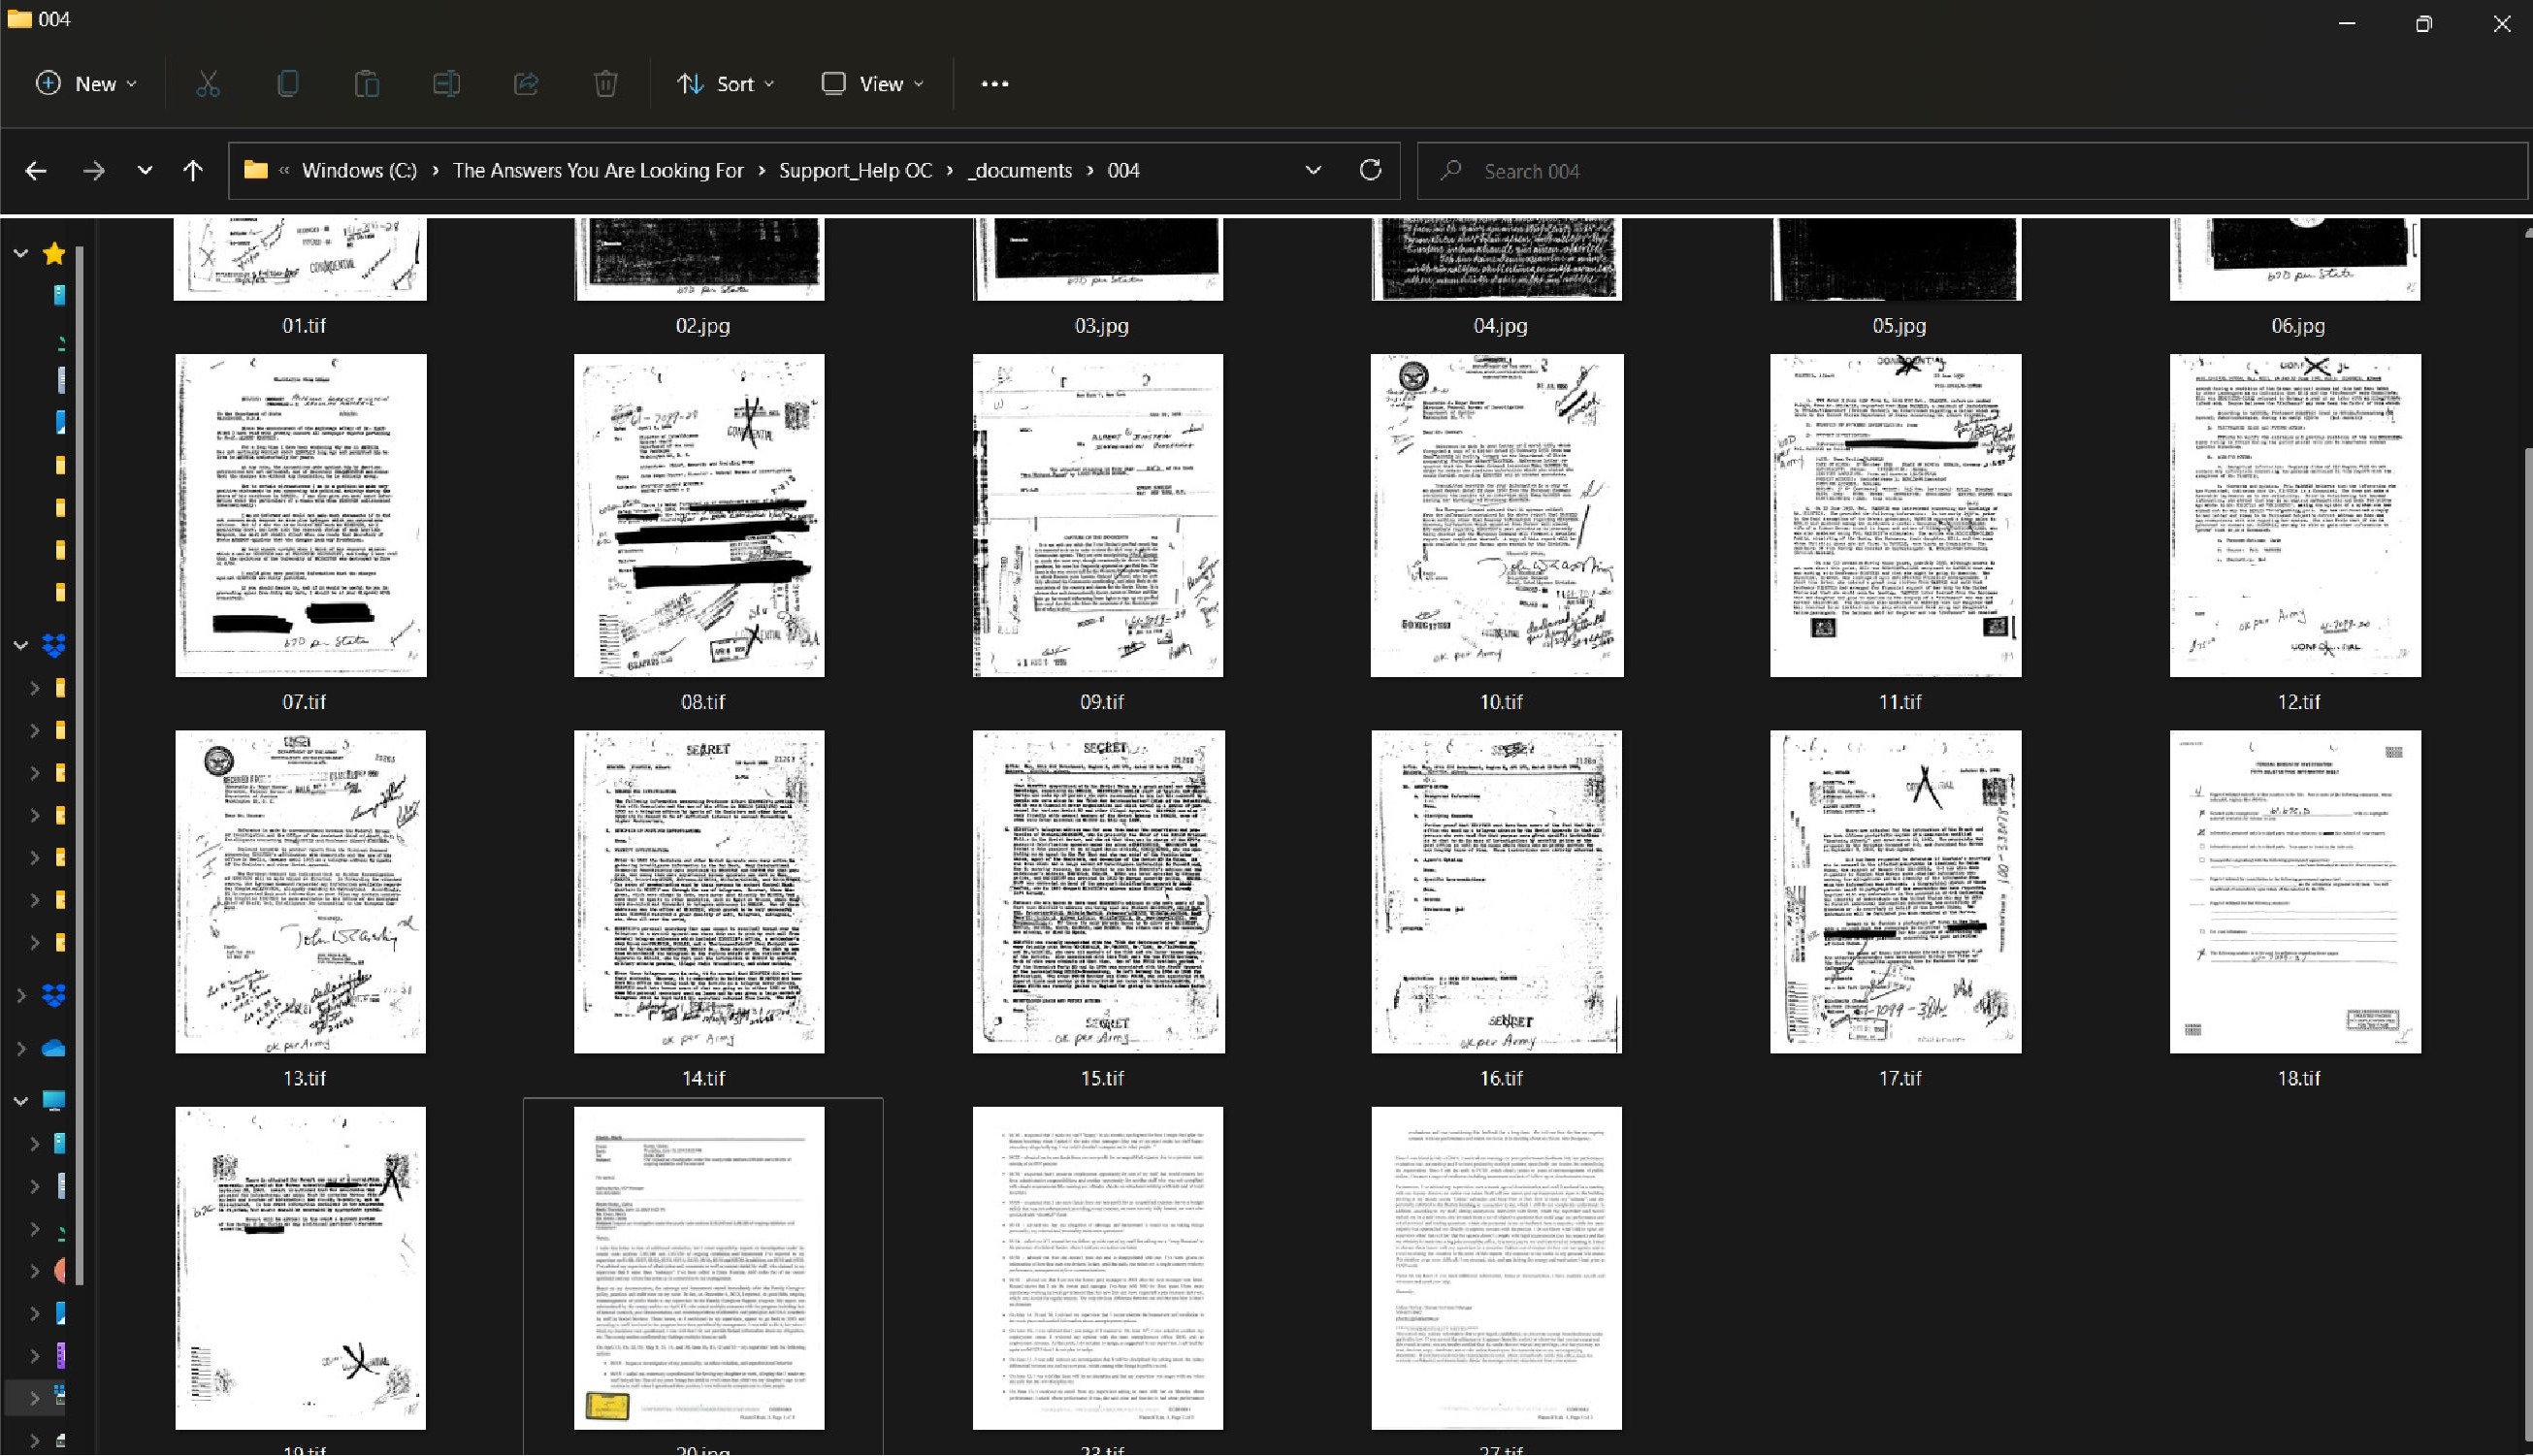
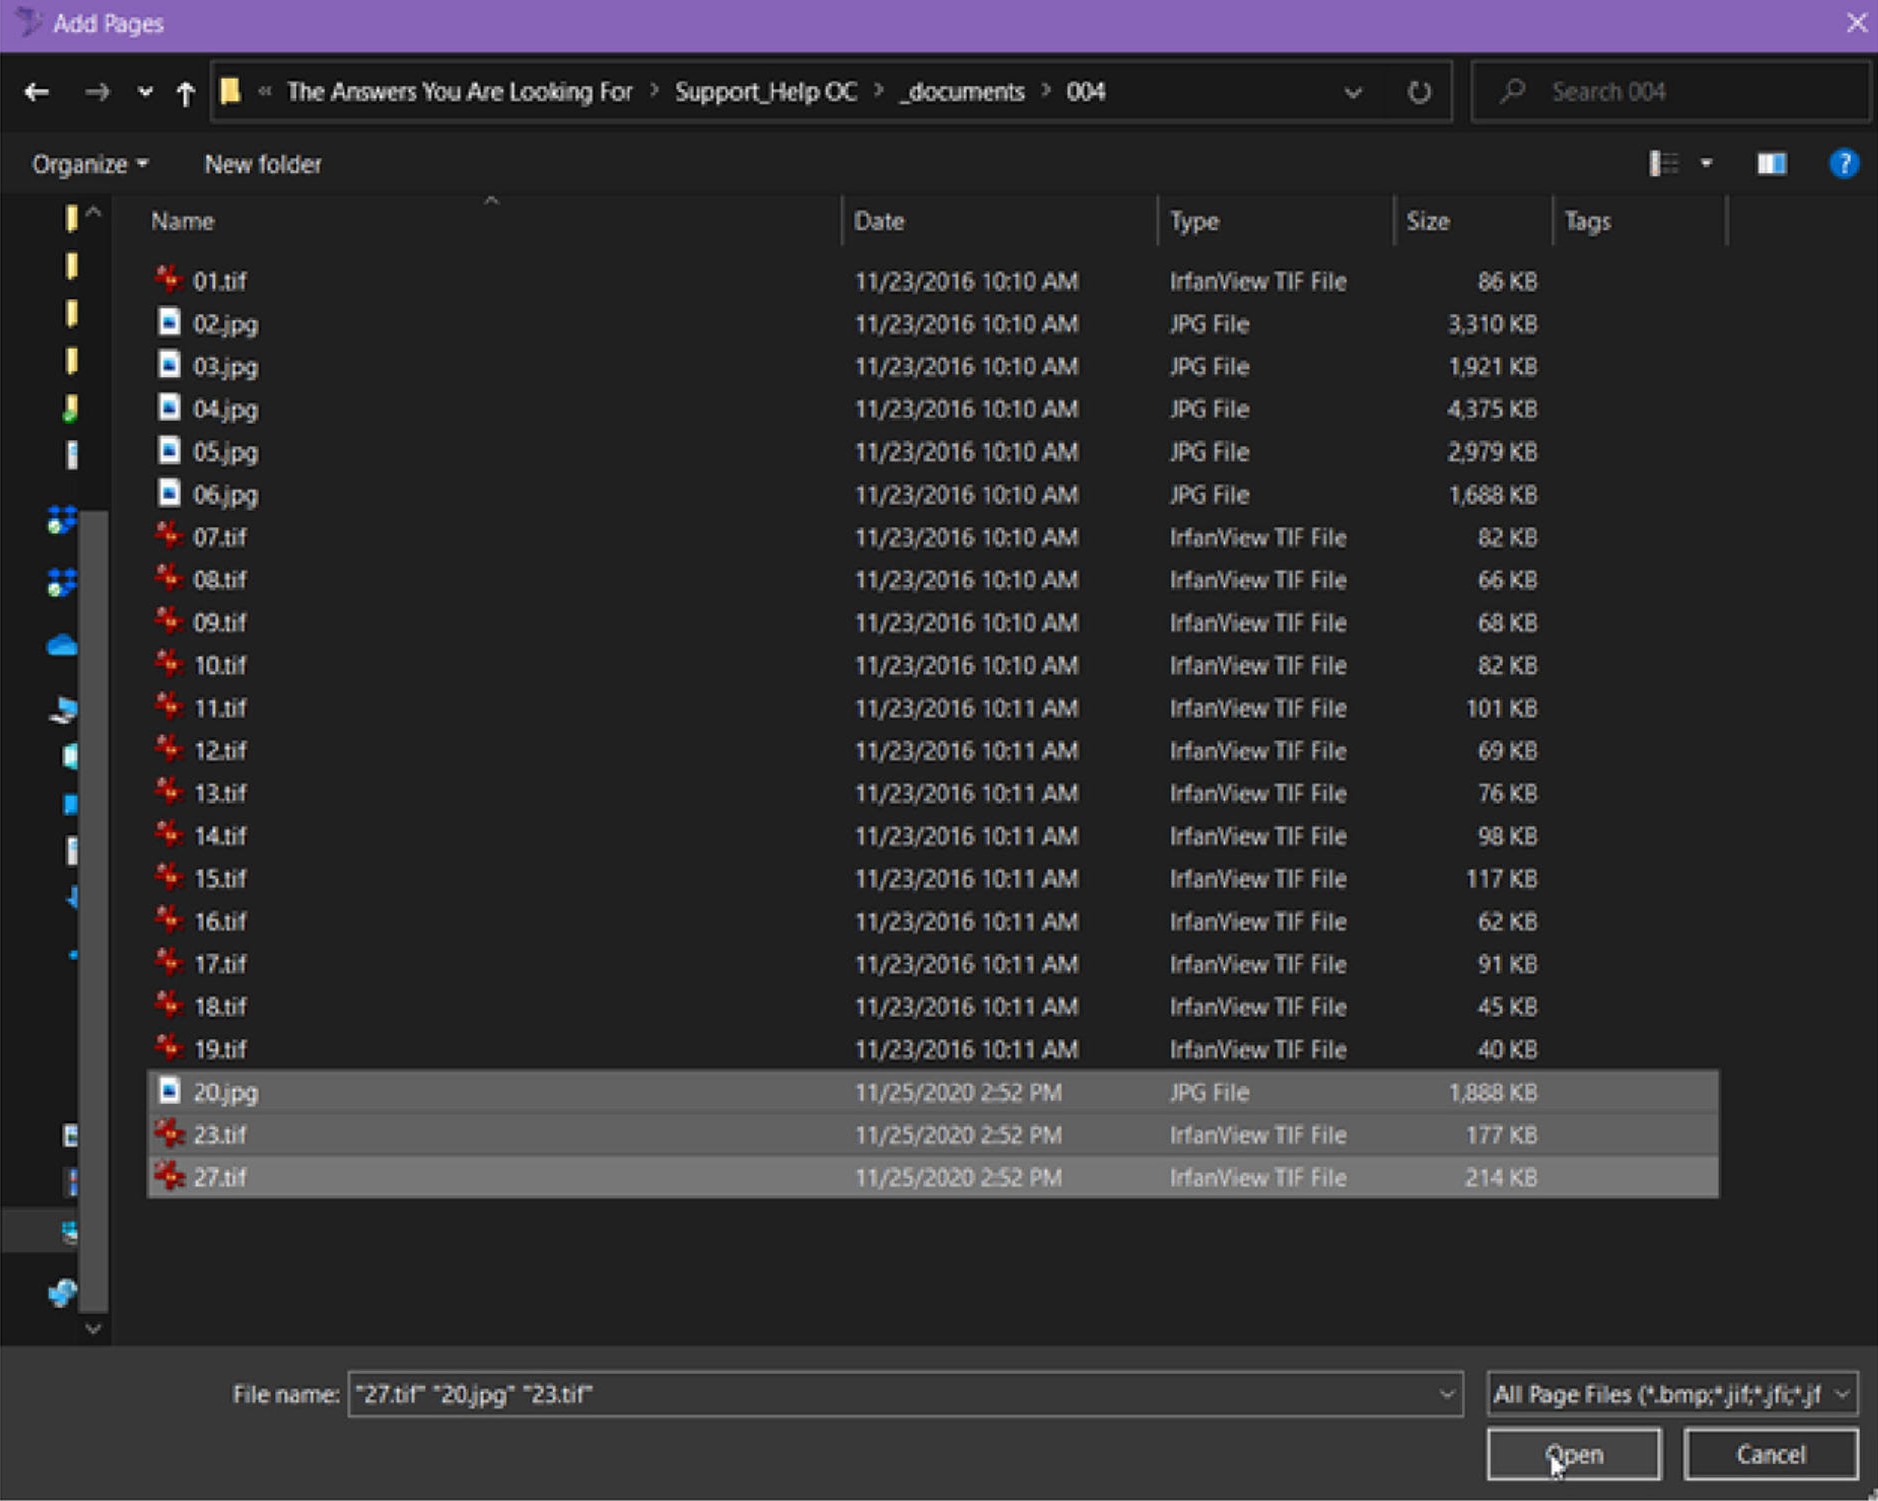
Put the new pages in NON-PDF format into the underlying document folder using Windows Explorer (in this case the 004 folder; 20.jpg, 23.tif, 27.tif are new pages).
Back in OnCue, right-click on the document you want to add the pages to (4-IBM) and select Add Pages.
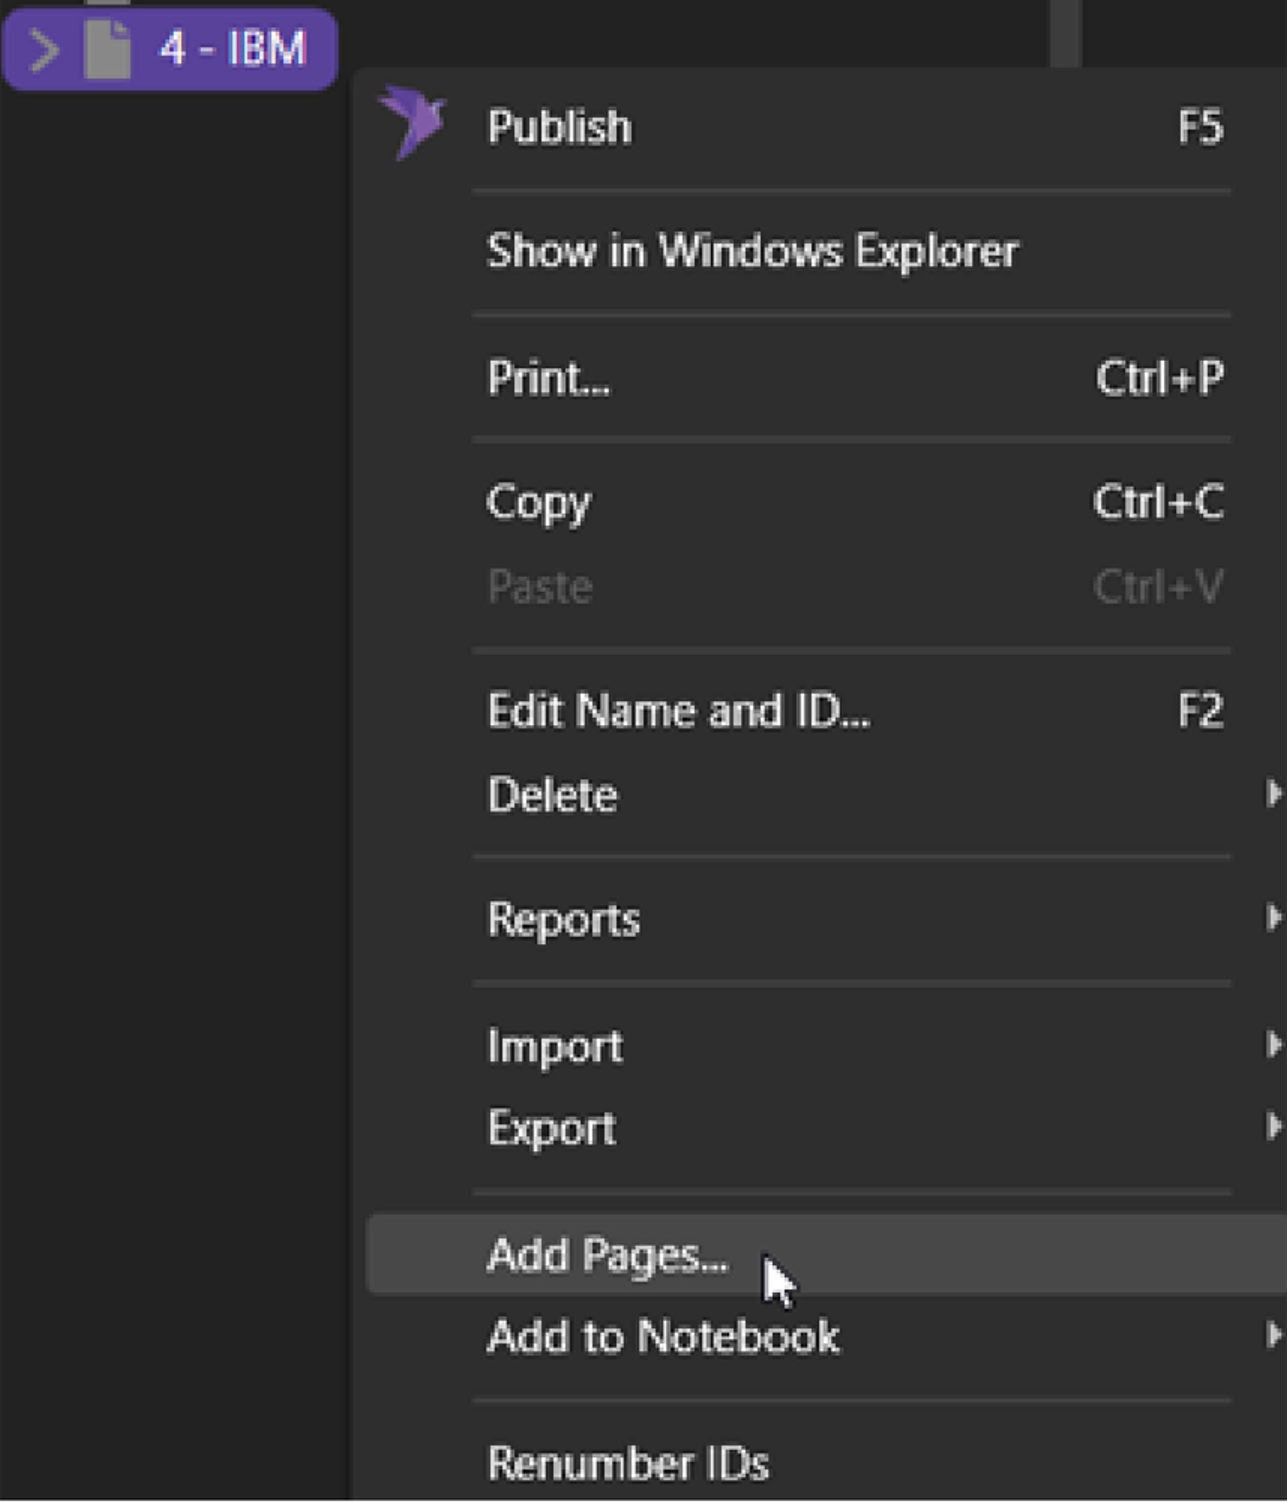
An explorer box will pop up, select your pages, and hit Open.
The pages are given the next IDs in line regardless of what they are called.
Reordering and Renumbering Document Pages
Did you know you can reorder pages inside OnCue without messing with the original/underlying document? Is the first page a title page and the next page is 1? Or maybe the scanned document is out of order?
Fixing a Non-Page Number Start Page
You can drag and drop your pages to reorder a document.
Choose the document you want under the document tab.
Drag and drop the pages to reorder them. Page two is now the first page in Exhibit 4 in the image below.
Note: You can drag a title page to the bottom of the document or just delete the page without deleting it from the underlying PDFs.

Now right-click on your document, choose Renumber IDs, and choose Renumber IDs again. This renumbers your document starting at 1.


Fixing a Non-Page 1 Start Page
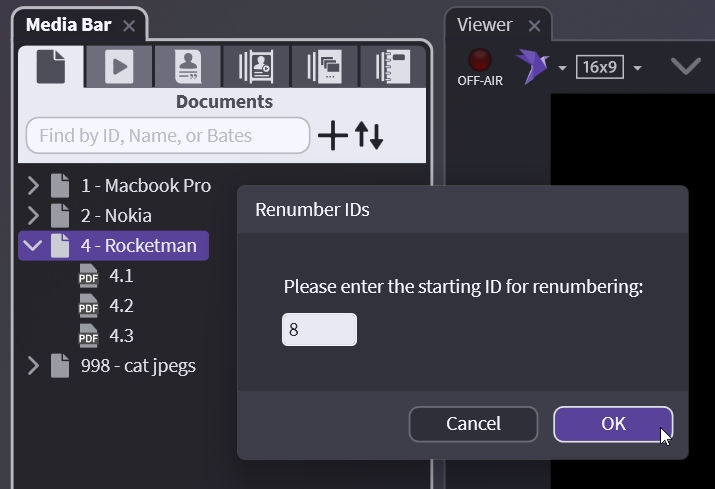
Choose the document you want under the document tab, right-click, select Renumber IDs, and then Renumber IDs Starting with…

Change to your new starting number and select Okay.
OnCue will only do consecutive numbers for auto-numbering.
You cannot change individual page IDs. To assign alternate IDs use the Bates or Name field.